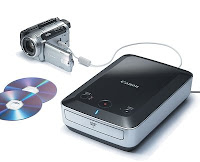
Just shot some exciting video footage in your mini-Dv camera?
Would you like to share it with your friends and family through DVD?
Follow these steps for easy transfer of your video footage to your DVD recorder.
Step 1:
Make sure your DVD recorder is connected to your television set and turned on.
Now connect your video camera to your DVD recorder.
You do this by connecting the video out and audio out of the camera to the video in and audio in of the DVD recorder. You would normally use RCA cables to do this.
If your DVD recorder has a firewire input also called (i.LINK or IEEE 1394 port) then you can connect your camera to your DVD recorder via a firewire cable.
Step 2:
This is important. Make sure you use your AC adapter to power your camera on. You don’t want to run out of battery power half-way through the video footage transfer.
Step 3:
Assuming you already have a tape inserted in your camera, set your camera to playback mode.
Step 4:
Now you would have set your DVD recorder input signal. If you’re recording from a firewire, you would have to set your input signal to DV.
If you’re using analog inputs, then you would have to set it to AVI or AV2, depending on the location where you’ve plugged your cable in.
Refer to your DVD recorder manual if you’re unsure about this. You can easily change your input signal by using your remote control.
Step 5:
To also view the footage you would have to set the input signal of your television set to accept signal the A/V signal from the DVD recorder. Check to which AV input your DVD recorder AV out are connected. Refer to your television manual if you’re unsure. It’s usually AV2 if you already have a DVD player connected to your television.
Step 6
It’s time to test your connection now. Press Play on your video camera to make sure you’ve made the right connection. If you have your video footage from the mini-DV camera should play on your television with sound. If you don’t see any video or hear audio, you would have to check your connections again.
Step 7:
Assuming your connections are okay, rewind your DV tape to the position you wish to record from. Insert a DVD recordable disc (DVD+/-R or RW) into your DVD recorder. Select the recording mode or quality. The standard recording mode is SP, which allows you 2 hours of video on a disc.
Step 8
You’re now ready to begin recording. Press the Play button on your camcorder and at the same time press the Record button on the DVD recorder. You can do this easily by setting the DVD recorder on pause recording mode. When you press the PLAY button on the mini DV camera, you can release the Pause mode on the DVD recorder.
Step 9
When you have finished transferring video from your camera, press the STOP button on your DVD recorder. You can play back the video from the DVD by pressing the Play button on the DVD recorder. If you want the disc to play in your DVD player, you would have to finalize it. Refer to your DVD recorder manual for instructions.


